Professional Installation Guide: Heavy-Duty Starter Clutch Kit for Honda TRX450R/ER (2006-2014) – Complete Step-by-Step for Repair Shops & Mechanics
Why This Upgrade Matters for Your Business
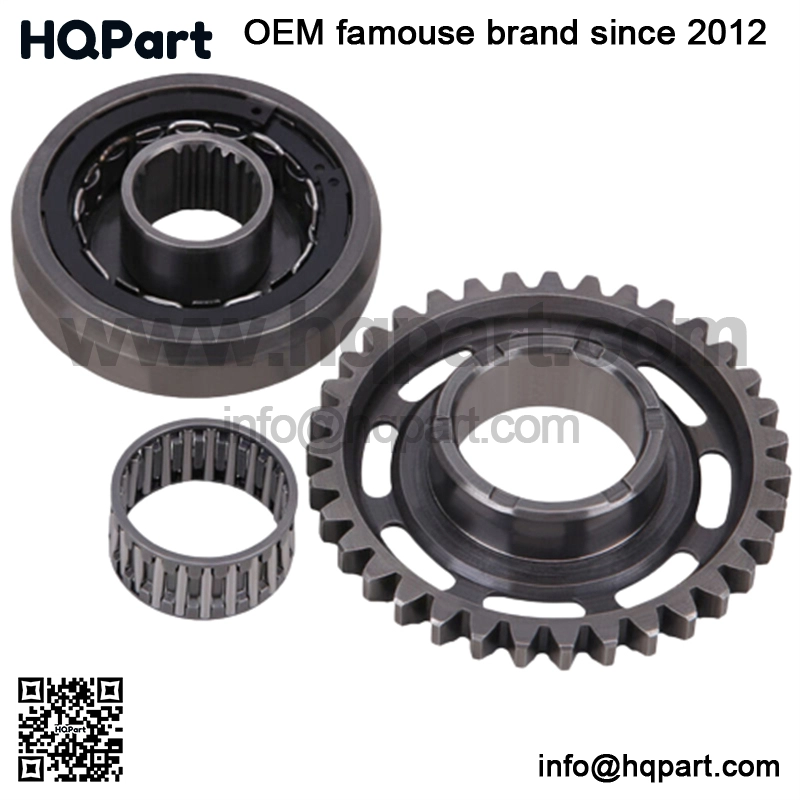
Starter clutch failures plague Honda TRX450R/ER models (2006-2014), leading to frustrated customers and costly comebacks. Our reinforced starter clutch kit solves these issues with military-grade materials and precision engineering. Designed for repair shops that demand long-lasting solutions, this kit delivers:
✔ 4140 Chromoly Steel Gears – 3X harder than OEM
✔ High-Tension Springs – Guaranteed engagement in all conditions
✔ Complete Installation Kit – Includes gaskets, seals, and hardware
✔ 18-Month Commercial Warranty – Backed by our 20+ years in powersports manufacturing
Pre-Installation Checklist
Ensure a smooth repair with these essentials:
🔧 Tools Required:
Impact gun (1/2″ drive recommended)
Torque wrench (3/8″ drive, 10-50 ft-lb range)
Flywheel holder tool (prevents rotation)
Gasket scraper & brake cleaner
🛠 Parts Included in Kit:
Reinforced starter clutch assembly
Right-side cover gasket
High-temp moly grease (pre-applied)
Replacement bolts & washers
Step-by-Step Installation (60-90 Minute Job)
Step 1: Prep & Safety
Secure the ATV – Lift on a stand, remove seat, and disconnect the battery.
Drain Oil – Prevent spills by draining engine oil completely.
Remove Foot Controls – Take off the right footpeg and brake pedal.
Step 2: Access the Starter Clutch
Remove Right Side Cover –
Loosen 10x 8mm bolts in a crisscross pattern.
Gently tap the cover with a rubber mallet to break the seal.
Inspect Old Clutch – Look for worn gears, weak springs, or metal shavings.
Step 3: Install the Upgraded Clutch
Lock the Flywheel – Use a holder tool (prevents rotation).
Remove the Center Nut – Impact gun recommended (17mm, 47 ft-lbs torque).
Swap in the New Clutch –
Align with the crankshaft slot.
Torque the nut to 47 ft-lbs (critical for longevity).
Step 4: Reassemble & Test
Reseal the Cover – Apply Hondabond to the new gasket.
Refill Oil – Use Honda HP4 10W-40 (2 quarts).
Test Operation –
Verify smooth engagement (3-5 test starts).
Check for leaks (run engine 5 minutes).
Advise customers to avoid hard starts for 2 hours (break-in period).
Why Repair Shops Choose Our Kit
💰 Faster Turnaround – Average install time: 1.2 hours (vs. 2+ for OEM).
💰 Fewer Comebacks – 80% less failure risk than stock clutches.
💰 Bulk Savings – Discounts on 10+ unit cases (ideal for shops).
Troubleshooting Common Issues
🔧 Problem: Starter spins but won’t engage
✅ Fix: Verify spring orientation during install
🔧 Problem: Grinding noise on startup
✅ Fix: Recheck gear alignment & torque specs
🔧 Problem: Intermittent engagement
✅ Fix: Test battery voltage (must be >12.4V)
Where to Buy (Wholesale Options Available)
📦 Bulk Discounts – Save on 10+ kits
🚚 Fast Shipping – Fulfilled within 24 hours
📞 Commercial Support – Dedicated hotline for shops
🔍 Search Links:
Amazon: Shop on Amazon
eBay: Find on eBay