1
Jack the vehicle up and remove the wheel. Park the vehicle on a firm, level surface. Use a tire iron or the appropriate socket to loosen the lug nuts on the first rear wheel, then slide a jack beneath one of the vehicle’s rear designated jack points to lift the vehicle up.
- Always use jack stands when working on a jacked up vehicle.
- Unscrew the lug nuts and remove the wheel.
2
Remove the dust cap with a screwdriver. With the wheel removed, you will be able to see the outside of the brake drum directly behind where the wheel used to be. The center of the circular brake drum is a removable dust cap. Slide a flat head screw driver into the gap beneath the dust cap and pry it toward you to remove it.
- The dust cap may have rusted in place or could be stuck due to brake dust and road grime.
3
Use a ratchet to unscrew the axle bearing nut. Beneath the dust cover, you’ll find the axle bearing nut. This large nut is usually a 22 or 24 millimeter metric socket, or a 7/8” standard socket. Use a breaker bar or half inch drive ratchet to turn the nut counterclockwise in order to remove it.
- Set the nut aside someplace safe for use when reinstalling the drum.
4
Twist the drum as you pull it backward to remove it. With the axle nut removed, the drum will no longer be held in place, but may still be stuck on due to rust or grime. Twist the drum slightly as you remove it to break it free from any rust.
- The drum may be extremely difficult to remove.
5
Spray the drum with rust remover if it’s stuck. Rust removers like WD40 can help loosen the grip created by rust on your vehicle’s drums. Spray it around the outside circumference of the drum where it meets the vehicle and give it a few minutes to set in. Then attempt to remove the drum again.
- You may bang on the drum with a rubber mallet to help loosen it up.
Part2
Pulling Out Old Brake Pads
1
Use pliers to remove the primary brake shoe springs.
- Try not to bend the springs out of shape, as you will reuse them when installing the new brake pads.
2
Pull out the brake shoe clips. Use the same needle nose pliers to remove the clips that hold the brake shoe in place. There should be two clips inside the brake system that need to be removed prior to removing the pads themselves.
- Make sure to set the clips aside someplace safe for reuse when installing the new brake pads.
3
Remove the parking brake cable. The parking brake cable will be much easier to remove after the spring tension has been relieved. In some applications, it may be easier to remove the parking brake cable after you’ve pulled the brake shoe set away from the backing plate.
4
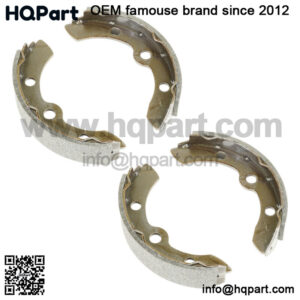
Pull the brake shoe set free from the backing plate. Grip the brake pads on either side and pull them directly toward you to separate them from the backing plate. The springs will come with the brake shoe set, but the parking brake cable should remain with the vehicle.
Part3
Replacing Brake Pads
1
Place the new brake set next to the old one.
2
Swap components onto the new set.
3
Reset the parking brake adjuster.
4
Hold the brake spring away from the end of the cable.
5
Place the shoe set against the backing plate and secure it.
6
Connect the return springs.
7
Install the new drum.
“Keyword”
“yamaha golf cart brake diagram”
“yamaha golf cart brake assembly”
“club car ds brake shoe replacement”

