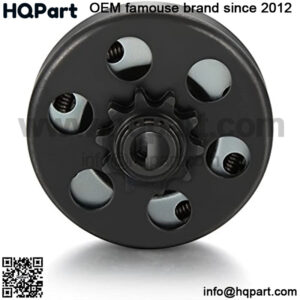
If you’re building your own go-kart or trying to replace a faulty clutch with a new one, you’ll most likely be confronted with the task of installing a go-kart clutch.
Here are the 4 steps to installing a clutch on a go-kart.
- Slide the Clutch Onto the Crankshaft
- Set the Clutch into Position
- Align the Clutch Sprocket With the Rear Axle Sprocket
- Do Final Preparations and Testing
These are the tools you’ll need:
- 1 x Centrifugal Clutch
- 1 x Set Screw (sometimes not included)
- 1 x Allen Key (for set screw)
- 1 x Washer (sometimes not included)
- 1 x Key
- 1 x Wrench
Before you start with the first step, you’ll want to ensure that the engine you are working on is easily accessible to you and that you have all the required tools prepared. You may also want to oil your go-kart clutch first, before you actually start the installation process.
1. Slide the Clutch Onto the Crankshaft
Now that the preparation is out of the way, you can proceed to slot the clutch onto the crankshaft of the engine. Ensure that the crankshaft is clean (you can wipe it down with a dry cloth) and slot the clutch into position.
Quick Guide:
- Slot the clutch onto the crankshaft (indicated with a red arrow in the illustration)
- Sprocket of clutch should face outward
- Don’t tighten the set screw yet
When you place the clutch onto the crankshaft, ensure that the key of the clutch is aligned with the keyway on the crankshaft. They should fit perfectly. Once aligned you can proceed to push the clutch all the way through.
You’ll want to make sure that you are installing the clutch outboard, as opposed to inboard. To install a clutch outboard, the sprocket of the clutch should be facing outward – pointing towards you, not towards the engine. You should only consider an inboard setup if you have space limitations on your go-kart.
After you have completed this, it’s time to move onto the next step!
2. Set the Clutch into Position
The next step involves setting the clutch in place so that it’s firmly secured. In order to do this you’ll need to make sure that you have the following parts in front of you:
- 1 x Set screw
- 1 x Bolt + washer
Quick Guide:
- The set screw is located on the back of the clutch (facing the engine)
- Set the screw in place firmly
- Then, tighten the washer and bolt to the front of the crankshaft
Setting the Set Screw
You’ll want to secure the go-kart clutch in place by tightening the set screw in the set screw hole, which is located at the back of the clutch – facing the go-kart engine.
Simply place it in, and screw until it’s reasonably tight. You’ll need a right-sized Allen/Hex key for this. Take note that some go-kart clutches do not come with set screws. In that event, you’ll need to source one independently.
Setting the Bolt and Washer
Now you’ll need to secure the clutch on the crankshaft by placing the bolt into the bolt hole located in the front of the crankshaft (it’s the large opening facing you).
Before slotting in the bolt, ensure that you have a washer in place, as the bolt is usually too small. Tighten it using a wrench and ensure that the clutch is firmly held in place.
3. Align the Clutch Sprocket With the Rear Axle Sprocket
Now that the clutch is on the crankshaft of the go-kart engine it’s time to align the clutch sprocket with the rear axle sprocket. There are several ways to do this.
Quick Guide:
- Loosen the rear axle sprocket, move the kart or rear axle back and forth to automatically align the clutch
- Tighten rear axle sprocket once aligned
The easiest way to align the rear axle sprocket with the clutch is to loosen the sprocket on the rear axle and connect the drive chain to the clutch sprocket and rear axle sprocket. If the go-kart is on the floor, simply move it back and forth and you’ll see that the go-kart chain automatically places the rear axle sprocket into alignment.
If your go-kart is on a stand, you can simply turn the wheels or rear axle back and forth to achieve the same thing. If you want to be more accurate, you can use a large rod or a laser tool to align the clutch sprocket and the rear axle sprocket.
Don’t forget to properly tighten the rear axle sprocket and ensure it’s firmly held in place. As you can see, there are several ways to achieve this. Check out this detailed guide on ways to align go-kart sprockets.
4. Do Final Preparations and Testing
Now, this part is easy! All you have to do is test your setup to ensure that all components are working as intended. Before you take your go-kart for a spin, it’s best to inspect the rear axle sprocket, drive chain and go-kart clutch to make sure that all are in place and set properly.
After you have done this, take your go-kart out for a ride to see if the new clutch is functioning properly.

